|


| |
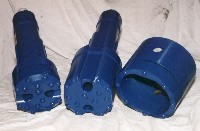
Xs
pneumatic Diverter
The Xs diverter kit comprises of a diverter assembly, two air cylinders and a
control box, and miscellaneous hose and fittings. The control box is to be
mounted (bolted or welded) at the drill rig’s control panel, and within easy
reach of the operator. The diverter and cylinders are to be mounted beneath the
Rotation Head drive spindle.
Installation of the Diverter
(Drawing 1)
The method of installation of the diverter and air cylinders depends on the type
of drilling rig it is being fitted to. Firstly attach the 20” saver sub to the
rotation head and tighten.
Note the saver sub should be smooth and free of wrench flats.
Next position the diverter over the saver sub exposing the bottom thread and
1”-2” of the sub is below the diverter. (This enables the sub to be clearly
visible when adding tubes during the drilling operation.)
Connect each rod end of the cylinder (in the closed position) to the diverter
with the pins provided, and align the cylinders vertically upward to find where
they can to be attached to the rotation head frame. (Some bracket work may be
necessary at this point.)
If the cylinders do not reach the underside of the rotation head, you may have
to raise the lifting arms on the diverter itself; (this also allows the diverter to
be rearranged if necessary to make the discharge port point in the desired
direction. It is recommended that the yokes of each end of the cylinders should
be mounted at 90 degrees to each other,
The anti-rotation arm should now be fitted in such a position contacting the
left hand side runner of the mast. Once the desired position is ascertained, the
bracket should be properly welded.
Note. The lifting brackets on the diverter and the anti-rotation bar are not
factory welded ready for use, but simply placed and tack welded to show one
possible position.
Maintenance.
Periodically as required the top seals on the diverter may need adjusting to
compensate for leakage, (the seals can be tightened with the four adjusting
bolts provided.)
When starting to drill, the casing may turn for the first 20-40ft of drilling
due to lack of ground friction, to accommodate this undesirable event, the
bottom of the diverter has a rotating bearing which may need to be removed and
cleaned from time to time.
Air Circuit
(Drawing 2)
The control panel needs to be mounted within easy reach of the operator, (a
popular location is on top of the drill rigs control panel).
An air supply hose from the drill rigs compressed air circuit to the rear of the
control box is needed to power the assembly. This supply hose must be rated to
accommodate the high pressure generated by your compressor.
Connect the cylinders together with flexible hose; coupling both top ports in
parallel to a common tee and both bottom cylinder ports in parallel to a common
tee, this causes the cylinders to act in unison. (Drawing 2)
It is advantageous to install quick couplers at these common supply points
(tees) so that the diverter is easily removed when not needed. One air supply
hose for the lifting side of the cylinders is connected with a quick coupler to
the tee joining them both, and the same for the downthrust side. These two
supply hoses are then routed along the hammer supply line up and down the side
of the drill mast, fastening them to the large hose with cable ties. The other
ends of the hoses are then attached to the up/down lever on the control panel. (Drawing
3)The control panel air pressure regulator should then be set to 100psi, and the
control lever should now raise and lower the diverter
Discharge Hose
The discharge hose should be attached to the outlet to direct the drilling
debris away from the operator.
In most cases a short discharge hose is adequate, but should a long discharge
hose be needed, care should be taken to secure the loose end to a solid object
to prevent hose whip.
Warning, unsecured long discharge hoses are dangerous. Any long discharge hose
should be well secured before drilling.
We recommend the following discharge hoses be used.
5" hammer: 4" or larger discharge hose
6" hammer: 5" or larger discharge hose
8" hammer: 6" or larger discharge hose
|